

close
Choose Your Site
Global
Social Media
Views: 0 Author: Site Editor Publish Time: 2026-10-11 Origin: Site


Did you know that up to 25% of a home's heat escapes through an uninsulated roof? This invisible heat drain inevitably leads to skyrocketing energy bills and uncomfortably drafty living spaces. Fortunately, upgrading your attic with high-quality roof glass wool insulation solves this widespread problem efficiently. By forming a robust thermal barrier, this material keeps your living space comfortably warm during winter chills. It also significantly slashes those ever-climbing utility costs. In this comprehensive guide, we walk you through the precise engineering steps required to install it safely and effectively.
Preparation is Crucial: Accurate measurement and assessing rafter depth dictate the success of your thermal envelope before you even purchase materials.
Safety First: Handling fibrous materials requires specific personal protective equipment, including gloves, goggles, and a mask, to prevent skin and respiratory irritation.
Material Selection: Depending on your roof architecture, you must choose the correct format between flexible rolls and rigid foil-faced boards.
Ventilation Matters: Maintaining a continuous 50mm air gap between the thermal layer and the roof felt is an absolute necessity to prevent interstitial condensation and structural rot.
From an engineering perspective, the building sector is currently undergoing a massive shift towards sustainable construction practices. Stricter global energy codes now demand significantly lower U-values for residential roofs. Coupled with volatile utility costs, contractors and homeowners are increasingly prioritizing materials that deliver high thermal performance alongside a low carbon footprint. Glass wool meets these modern demands perfectly. It is manufactured from recycled glass and silica sand, melted at high temperatures, and spun into fine, resilient fibers. This unique manufacturing process creates a highly stable matrix that offers a balanced combination of thermal, acoustic, and fire-safety benefits.
The primary function of any insulating material is to resist heat flow, a metric commonly referred to as the R-value. This fibrous matrix achieves its exceptional thermal resistance by trapping millions of microscopic air pockets within its spun fibers. These air pockets drastically minimize conductive heat transfer. During winter months, the material prevents indoor heating from escaping through the roof structure. Conversely, during the peak of summer, it acts as a formidable barrier against solar radiant heat, keeping the living space below consistently comfortable.
Beyond basic temperature control, this insulation provides substantial acoustic dampening. The dense, fibrous structure is highly effective at absorbing and dissipating sound waves. This characteristic is particularly beneficial in loft conversions or pitched roofs where external noises—such as heavy rain, hail, or nearby traffic—can easily disrupt the indoor environment. Installing this material allows homeowners to significantly reduce decibel transmission through the entire roof assembly.
Safety remains a paramount concern in residential roof construction. High-quality fiberglass batts are inherently non-combustible. They consistently achieve a Euroclass A1 fire rating, meaning they do not contribute to the spread of flames nor do they emit toxic smoke during a fire event. Adding this non-combustible layer between timber rafters provides vital structural protection and complies with the strictest residential building safety codes.
Selecting the correct format of thermal barrier depends entirely on your roof's architecture, rafter spacing, and specific thermal targets. Understanding the subtle differences between available products ensures a smoother installation process and optimal energy performance. To make the selection process easier, refer to the comparison breakdown below.
Product Format | Ideal Application | Key Specifications | Installation Method |
|---|---|---|---|
Flexible Rolls | Standard pitched roofs, irregular rafter spacing, attic floors. | Density: 10-48 kg/m³ | Friction-fitted between timber joists. Easily cut to custom widths. |
Foil-Faced Boards | Warm roof setups, maximum thermal reflection, limited headroom. | Density: 48-96 kg/m³ | Mechanically fastened or tightly fitted. Tape seams for airtightness. |
This format is the most versatile solution for residential pitched roofs. The material is manufactured in long, continuous rolls that are highly flexible and easily cut to custom widths. It is specifically designed for friction-fitting between standard timber joists and rafters. Because it is compressible, it easily accommodates slight variations in rafter spacing without leaving vulnerable thermal gaps. For homeowners looking for a reliable and adaptable solution, utilizing glass wool roll insulation is an excellent starting point for seamless rafter application.
In scenarios where higher rigidity and built-in moisture management are required, foil-faced boards are the superior choice. These boards are denser than standard rolls and feature a bonded aluminum foil layer on one side. The foil serves a dual purpose. First, it acts as an integrated vapor control layer to prevent moisture penetration. Second, it reflects radiant heat away from the living space. If you are insulating directly under the rafters and need maximum thermal reflection, integrating a foil faced glass wool board can significantly enhance the overall energy efficiency of the roof system.
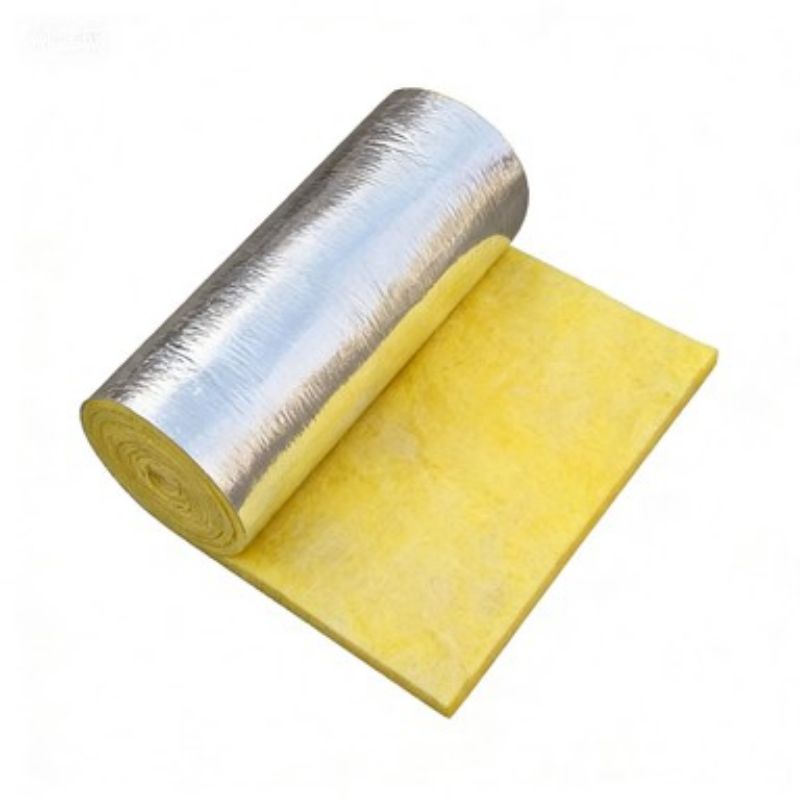
Proper preparation separates a successful professional-grade installation from a frustrating DIY ordeal. When you are balancing on a ladder in a dusty attic, having the right tools within arm's reach is critical. Handling fibrous materials requires strict adherence to safety protocols before you even open the packaging.
While modern fiberglass is safe to use and heavily regulated, the microscopic glass fibers can cause temporary mechanical irritation to the skin, eyes, and respiratory system during handling. This is a physical abrasion rather than a chemical reaction. To protect yourself, safety gear is non-negotiable.
Disposable Coveralls: Wear a long-sleeved, hooded protective suit to keep stray fibers off your skin.
Heavy-Duty Work Gloves: Nitrile-coated or thick leather gloves will protect your hands during cutting and fitting.
Safety Goggles: Ensure they are tightly fitted or wrap-around style to prevent airborne dust from entering your eyes.
Respirator Mask: An N95 or FFP3 dust mask is mandatory to prevent the inhalation of fine glass particles.
Having precise tools will ensure the thermal barrier fits snugly, which is vital for maintaining its stated thermal resistance.
Tape Measure: Necessary for accurately measuring rafter gaps.
Insulation Knife: A specialized long, serrated knife is required for clean cuts. A standard utility knife will tear the fibers.
Straight Edge: Use a spirit level or metal ruler to guide your knife and ensure straight, parallel cuts.
Staple Gun: Required for securing the separate vapor control layer to the timber rafters.
Foil Tape: Heavy-duty aluminum foil tape is needed to seal the joints of the vapor barrier, ensuring complete airtightness.
Never install thermal barriers directly into an unprepared roof space. A thorough inspection and precise measurements are foundational steps that prevent structural damage and ensure the material performs exactly as intended.
Before purchasing your materials, examine the entire roof cavity. Look for damp spots on the timber, signs of mold, or daylight showing through damaged roof tiles. Fibrous insulation loses its thermal resistance if it becomes saturated with water. Furthermore, trapping moisture against wooden rafters will accelerate rot and structural degradation. Any roof leaks, damaged felt, or condensation issues must be professionally repaired before you begin the installation.
Accurate measurements dictate the thickness and width of the material you need. Measure the depth of your rafters, calculating the distance from the underside of the roof felt to the inner edge of the timber. Next, measure the distance between the rafters to determine the exact width required. Roof timbers are rarely perfectly spaced, so measure at multiple points to find the average width. You will use these dimensions to cut your material accurately, ensuring a tight fit that prevents thermal bypassing.
One of the most critical building code requirements for pitched roofs is maintaining adequate airflow. You must leave a continuous 50-millimeter air gap between the underside of the roofing felt and the top of the insulation. This ventilation channel allows ambient air to flow from the eaves to the roof ridge, carrying away moisture vapor. Without this gap, condensation will inevitably form on the underside of the cold roof felt, dripping back down into the attic and causing severe damp issues over time.
Installing thermal layers requires patience and precision. Follow these standardized engineering steps to ensure a safe, efficient, and code-compliant installation in your pitched roof.
Fiberglass batts are heavily compressed and vacuum-packed for shipping efficiency. Carry the sealed packages into the roof space first, since transporting them while compressed is significantly easier. Carefully cut the plastic packaging open. Roll out the material on a clean, flat surface and allow it to sit for 15 to 30 minutes. The fibers need this time to decompress and recover their full manufactured thickness. Installing the product while it is still compressed will result in a severely compromised thermal rating.
Using your earlier rafter measurements, mark the required width on the roll. Cut the material approximately 10mm to 20mm wider than the actual gap between the rafters. This slight oversize is crucial. It creates a friction fit, allowing the material to hold itself in place against the timber without the need for immediate mechanical fasteners. Place a wooden board across the material, compress it slightly with your knee, and use your serrated knife to make a clean, continuous cut.
Gently lift the cut segment and press it up between the rafters. Ensure you push it back far enough to sit flush, but remember to maintain the essential 50mm ventilation gap behind it. The golden rule during this step is to avoid squashing or forcing the material. Compressing the fibers squeezes out the trapped air pockets, which directly destroys its thermal resistance. The material should fit snugly against the timber sides but remain fluffy and uncompressed in its depth.
Modern building regulations often require a total thickness of 270mm to 300mm to meet stringent energy efficiency standards. Since most standard roof rafters are only 100mm to 150mm deep, a single layer is rarely sufficient. To achieve the required rating, install a second layer horizontally across the face of the rafters. This method, known as cross-hatching, is highly effective because it covers the timber rafters entirely. It eliminates thermal bridging, which is the process where heat escapes directly through the solid wood. This second layer is typically secured using horizontal timber battens.
Once all the batts are securely in place, you must install a vapor control layer on the warm side, which is the side facing the interior room. This is usually a heavy-duty polythene sheet. Stretch the sheet across the rafters and staple it securely to the timber. The vapor barrier prevents warm, moisture-laden air from your living space from entering the roof cavity and condensing inside the cold attic. Overlap any joints in the polythene by at least 100mm. Seal every seam, staple puncture, and perimeter edge with heavy-duty foil tape to create a completely airtight barrier.
Before beginning your project, you must identify whether your building strategy requires a Cold Roof or a Warm Roof setup. The terminology refers to where the thermal boundary is placed, not the actual temperature of the roof tiles.
If your loft is strictly used for storage or remains unused, a Cold Roof setup is the most practical and cost-effective approach. In this scenario, the glass wool insulation is rolled out horizontally flat across the attic floor, fitting between and over the ceiling joists. This keeps the heat inside the living rooms below, leaving the empty roof space above cold. It requires less material, is much easier to install, and does not require complex ventilation gaps between the rafters.
Conversely, if you are converting your loft into a habitable living space, bedroom, or home office, you must utilize a Warm Roof setup. Here, the thermal barrier is installed directly into the pitched roof itself, fitting between and under the rafters. This brings the entire roof cavity into the thermal envelope of the home, keeping the loft space warm. This method is more complex. It strictly requires the 50mm ventilation gap beneath the roof felt and a meticulously sealed vapor barrier to prevent structural moisture damage.
Installing thermal barriers in a pitched roof is a highly rewarding project that can significantly reduce energy consumption. However, the effectiveness of the system relies entirely on precise execution. Even minor errors during installation can compromise the thermal envelope, leading to heat loss, moisture accumulation, and potential structural damage.
One of the most frequent errors homeowners make is compressing the material to make it fit into a shallow space. The thermal resistance does not come from the glass itself, but rather from the millions of microscopic air pockets trapped between those fibers. When you squash a 150mm thick roll into a 100mm rafter cavity, you force the trapped air out. This drastically increases the density and destroys its insulating properties. Always cut the material to fit around obstacles rather than forcing it.
A pitched roof system must be allowed to breathe. When pushing batts down toward the edges of the roof near the eaves, it is incredibly easy to accidentally block the soffit vents. When airflow is restricted, warm, moisture-laden air becomes trapped in the cold attic space. Over time, this condensation drips onto your new installation and saturates the timber rafters, leading to wood rot and black mold. Always use plastic rafter baffles at the eaves to hold the material back and guarantee clear airflow.
Precision is paramount in thermal engineering. A common misconception is that a small gap between the edge of the batt and the wooden rafter is harmless. In reality, building science dictates that even a five percent gap in your coverage can result in up to a fifty percent reduction in overall thermal efficiency due to thermal looping and convective heat loss. Ensure your cuts are 10mm to 20mm wider than the rafter gap to create a snug, edge-to-edge contact.
Modern loft conversions often feature recessed downlights. A critical safety mistake is laying standard fiberglass directly over the top of these light fixtures. Traditional halogen and even some non-insulation contact rated LED downlights generate significant heat. If covered, the heat cannot dissipate, creating a severe fire hazard. Always leave a minimum clearance of 75mm around non-rated fixtures or install specialized protective fire hoods.
Once the installation is complete, a thorough evaluation is necessary to ensure the structural integrity and thermal performance of your pitched roof. Taking a systematic approach to post-installation checks will guarantee that your investment yields long-term energy savings.
Before sealing the roof space with plasterboard or leaving the attic, perform a final visual sweep. Use a high-lumen flashlight to inspect the edges of every rafter cavity. You are looking for shadows that indicate gaps or voids where the material has not fully expanded. Gently press the center of the installed batts. They should feel resilient and spring back to their original shape, confirming they have not been crushed.
In the weeks following your installation, particularly during colder months, monitor the roof space for changes in humidity. If you have installed the material correctly and maintained the 50mm ventilation gap, the roof timbers should remain dry to the touch. If you notice a musty odor, frost on the roofing nails protruding through the deck, or damp patches on the timber, you likely have a ventilation blockage or an unsealed gap in your vapor control layer that requires immediate remediation.
Implementing proper thermal management in your pitched roof lowers your energy bills significantly while keeping your living space comfortable all year round. Although installing these materials requires careful measuring and strict adherence to safety protocols, it remains a highly rewarding upgrade that adds lasting property value. Remember to always avoid compressing the material to maintain its structural efficiency, and ensure proper airflow is preserved to prevent hidden moisture damage. For professional-grade results, selecting the right specifications is paramount. We highly recommend exploring the specialized insulation solutions at Atomsflex to find the perfect thermal barrier tailored to your specific roof architecture and energy goals.
Yes, a vapor barrier should always be installed on the warm side of the insulation, which is the side facing the interior living space. This impermeable layer prevents warm, moisture-laden air from inside the home from entering the attic cavity, thereby stopping interstitial condensation from forming within the glass fibers.
To meet modern building regulations and achieve optimal energy efficiency, a total thickness of 270mm to 300mm is generally recommended. Because standard rafters are rarely deep enough to hold this thickness, it is usually achieved by installing a 100mm layer between the rafters and cross-hatching a secondary, thicker layer underneath.
Standard rolls are highly flexible, making them much easier to friction-fit between uneven wooden rafters, and they are generally more cost-effective for large surface areas. Rigid boards offer a higher thermal resistance per inch of thickness and often feature reflective foil facings, making them ideal for spaces where maximum headroom must be preserved.
High-quality fiberglass is an inert, stable material that can last for 80 to 100 years without degrading in thermal performance. Its lifespan is virtually indefinite as long as the material remains dry, is not subjected to heavy physical compression, and is protected from pest infestations.
Yes, the microscopic glass fibers can cause temporary, mechanical irritation to exposed skin. To prevent this, always wear a disposable coverall, heavy-duty gloves, safety goggles, and a particulate mask during installation. Afterward, wash your hands and forearms in cold water to close your pores and rinse the fibers away before using warm water and soap.
Yes, you can safely lay new rolls directly over existing insulation, provided the old material is completely dry and free of mold or pest damage. If you are adding a second layer over existing joist insulation, run the new rolls perpendicular to the old ones to eliminate thermal bridging and maximize energy efficiency.
Modern, high-density glass wool is engineered to resist settling. As long as it is installed correctly without being compressed or exposed to water leaks, it will maintain its structural integrity and specified R-value for the lifetime of the building.


